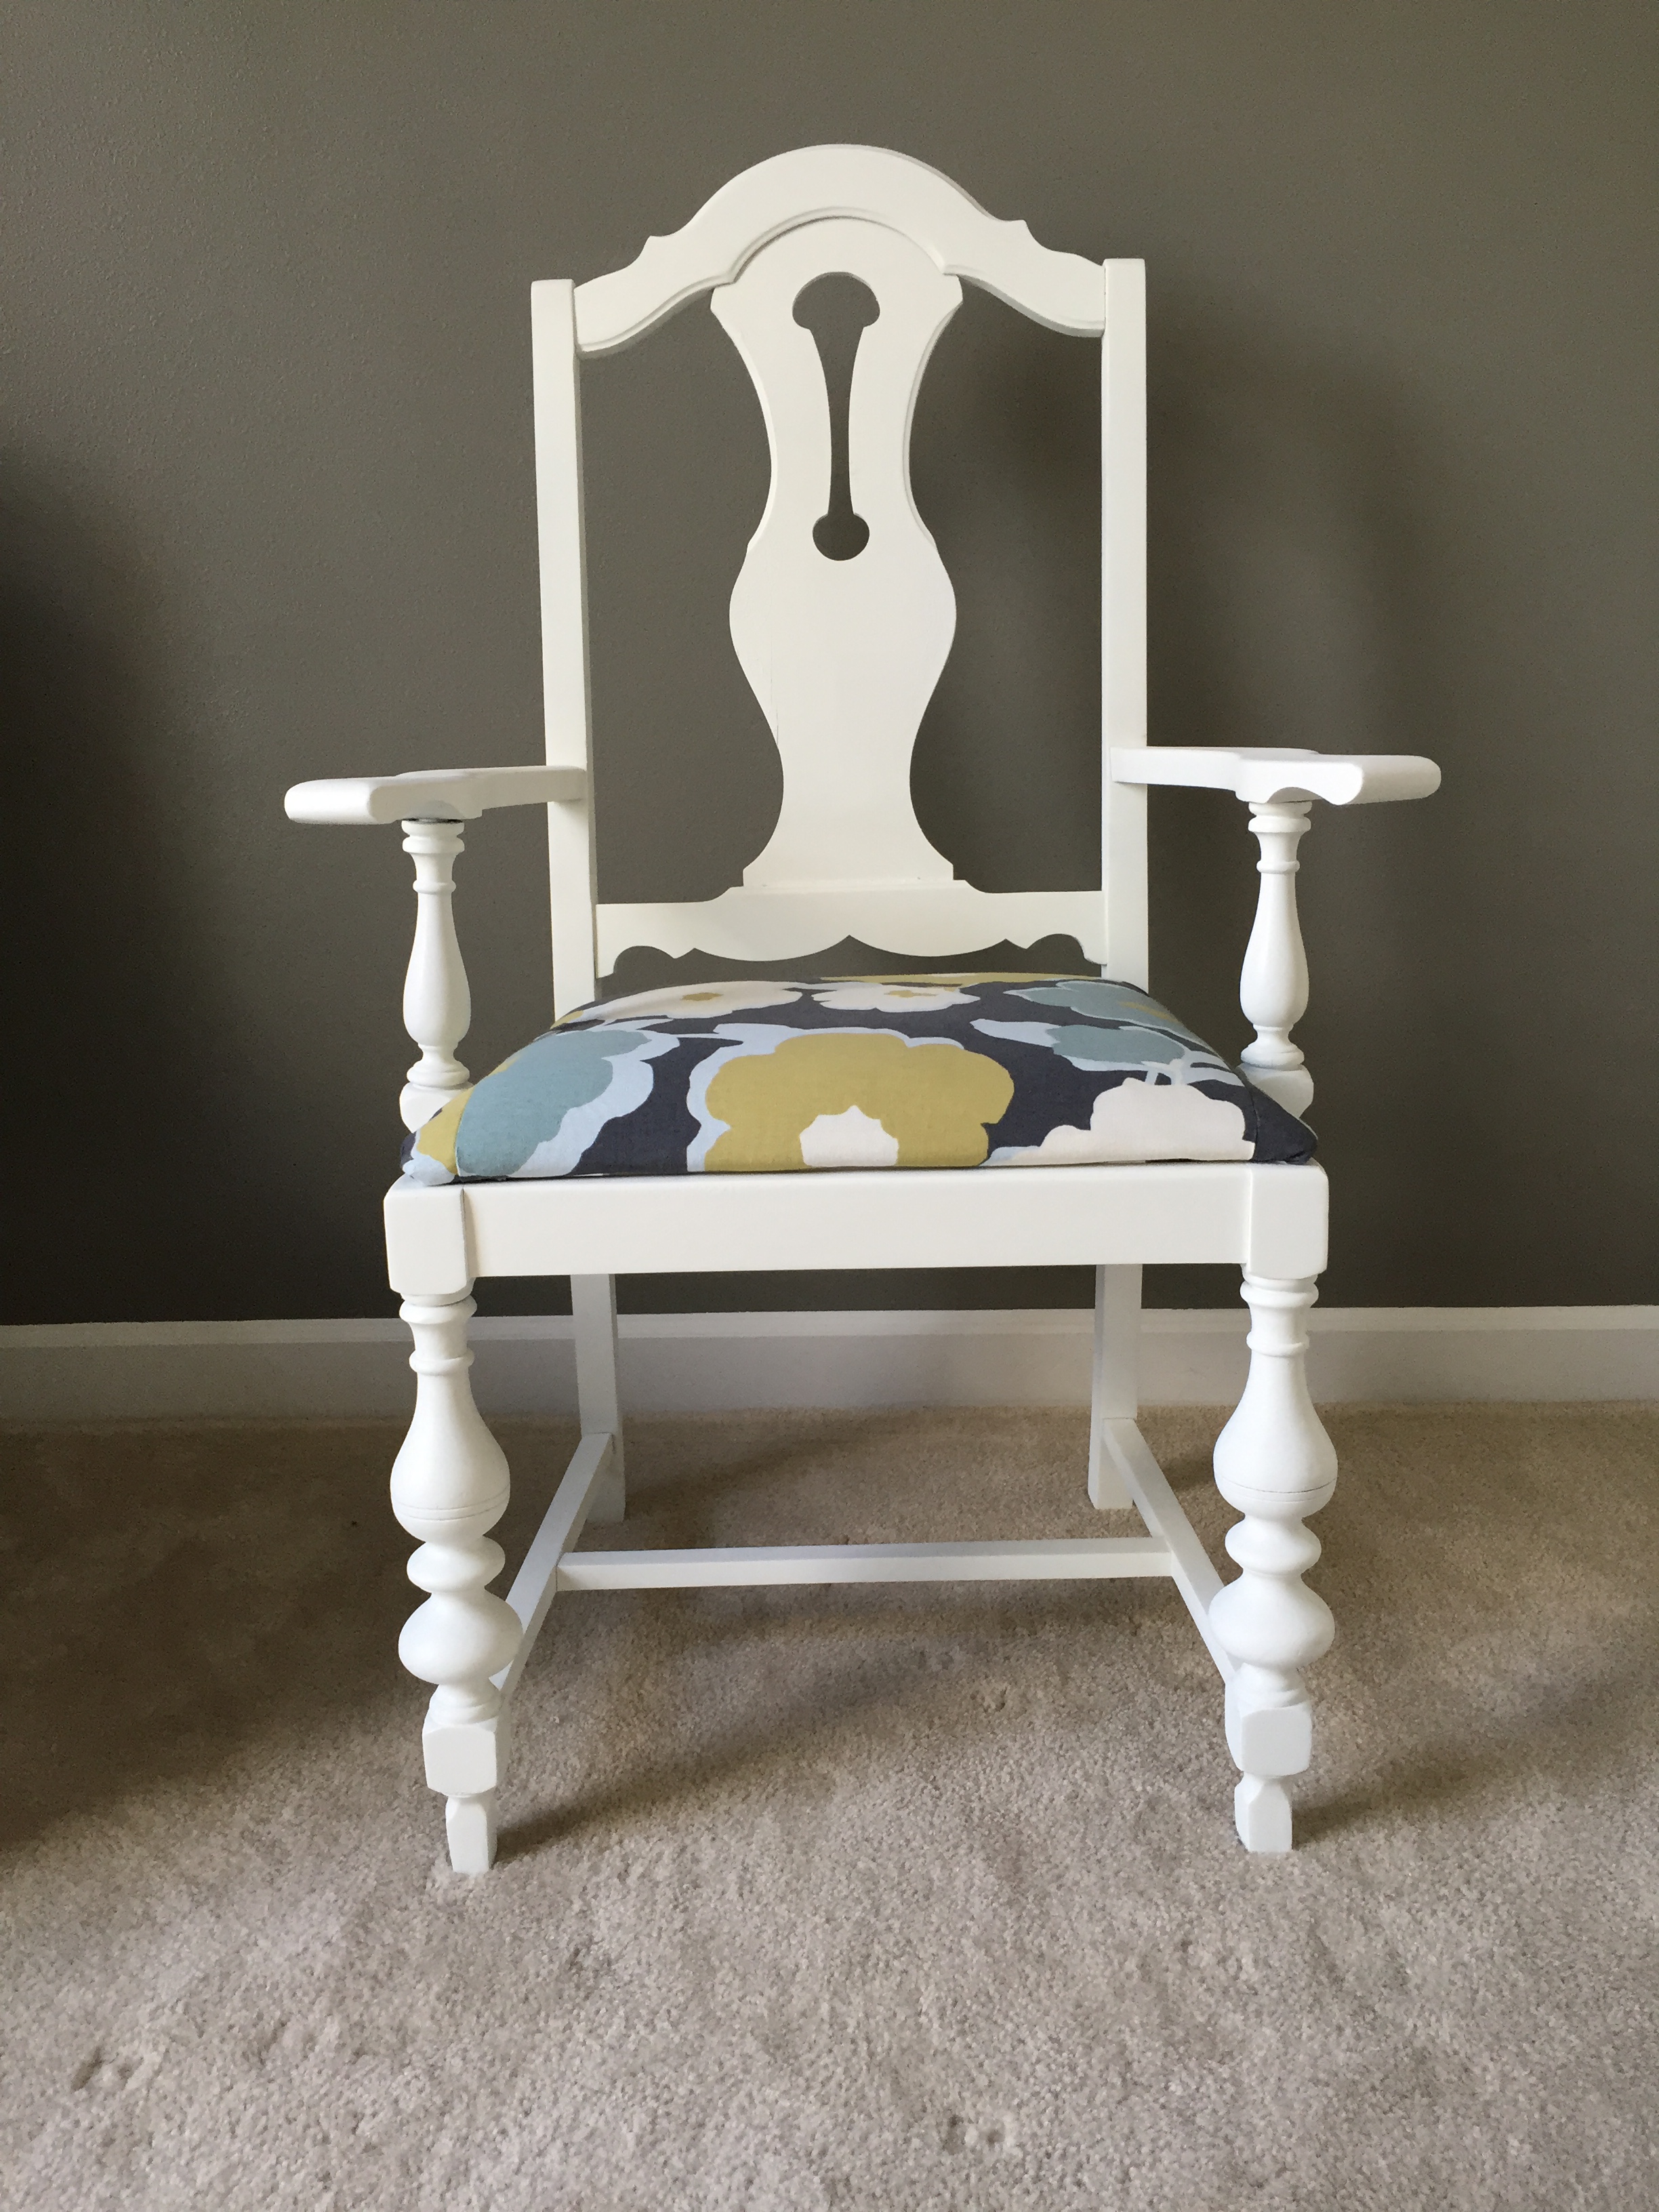
Please welcome our guest treasure hunter, Chelsea Price! For today’s Tuesday Treasures, we will enjoy the transformation of Chelsea’s gorgeous little antique chair!
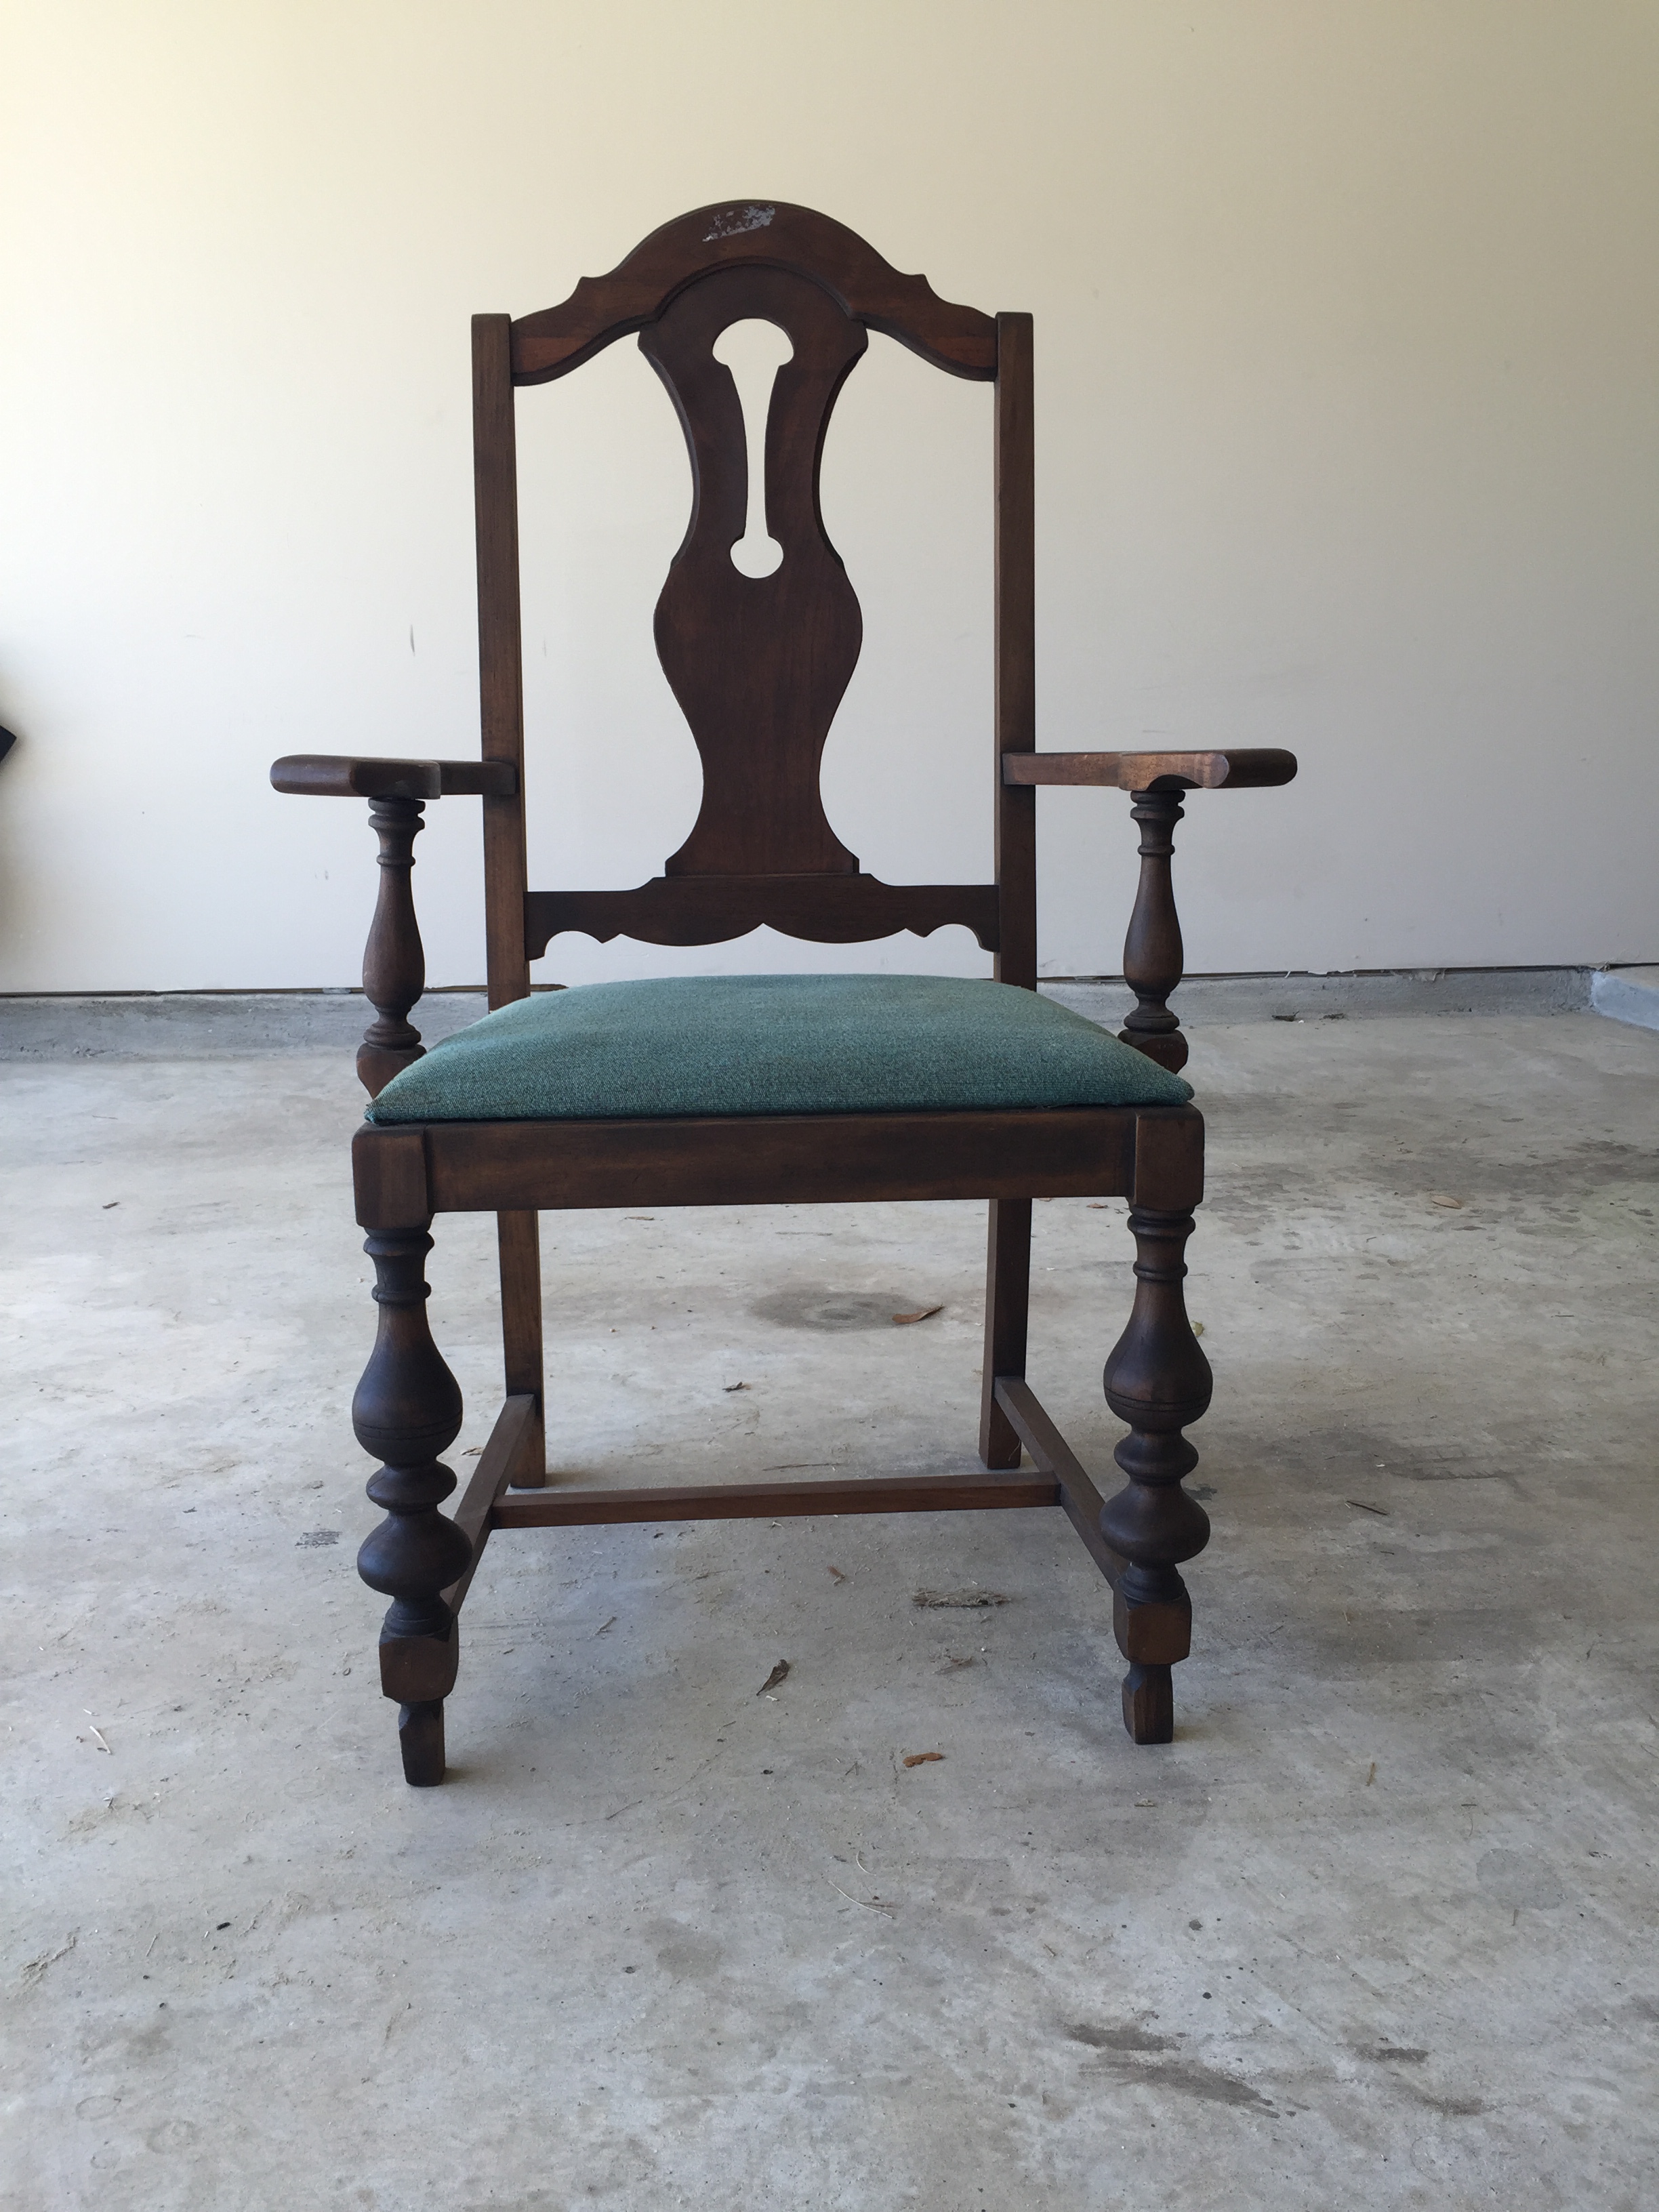
I love to antique shop, so when my husband and I found this super quaint shop in Groveton, Tx, I was in heaven. I found this chair right away for a steal of a deal. It was pretty rough, a little shredded in places and wobbly in others. But it was solid wood so I knew it had great potential. I brought it home and let it sit for months as I tried to decide if I should stain it or paint it white. I really like the clean-cut look so I went with white. (I know you natural wood lovers are going to kill me, but it was a choice I had to make.) So, now with the decision made I took it out to the garage and started sanding.
I used 150 and a 220 grit sand paper from Ace Hardware store. I started off with the 150 to get the heavy duty work done first and then moved to the 220. For those that are like me and didn’t really know the difference in sand paper (until my husband gave me a quick lesson) the smaller the number the rougher the grit. Always start with the small number first and then work your way up.
After the chair was completely sanded I dusted it off (which is KEY when spray painting anything, trust me, any dirt or dust and you will be crying when the paint hits the piece of furniture.) and starting fixing all the problem areas using Gorilla Glue. After all that was fixed and the dust was gone, I set up plastic and started priming.
I used ACE fast drying spray primer (it dries so stinking fast. It was awesome!) I should also say that when you spray anything give yourself about 8-12 inch distance and use brush stroke movements so you don’t get any runs in the paint.
Once the chair was completely primed I sprayed it with ACE Premium Enamel paint in the color white and the finish satin. Again using the same technique as the primer. This too was fast drying so I was able to do a couple coats really quick. I used 4 cans of white paint and 1 can of primer.
While the chair was drying I took the seat apart taking off the OLD fabric and reinforcing the wood. I used Gorilla glue again and then nailed it together in places that I thought needed a little more help.
For the seat cushion I used Airtex Regular padded foam (1″X15″X17) from JoAnn’s. I glued that to the wood seat with Gorilla Glue and then stapled it to the wood with an industrial hand stapler. I then covered that with batting 1/2″ think from JoAnn’s. Once that was stapled and secured to the seat I started measuring out the fabric.
I got the fabric from JoAnn’s also. They have great coupons on Retailmenot.com (this site is awesome and also has an app. I highly recommend it.) I allowed 4 inch excess on all sides and folded it over once to have a good clean look underneath. I started folding the corners first and stapling them in place. Then I stapled the sides trying to make it as clean as possible. Once everything was all done I put my lovely seat back on the chair screwing it into place. And WahLa! all done.

This was a 3 day project from start to finish, and there were a few set backs. With any DIY project you have to expect it won’t go the way you plan it to. But there is always a way to work it out. Also, there are no rules so just do it the best way you know how.


